These experiences can affect the users’ productivity and prevent them from upgrading their phones. If you have upgraded the phone to Android 14 and are struggling to downgrade it, please note that it is not a straightforward process. Many technical challenges are involved in downgrading the Google Pixel phone from Android 14 to Android 13. If not done right, it might also wipe off your critical data in the phone. So, to make sure you can smoothly downgrade the Android version, we have explained the process in a step-by-step format. Have a look at the complete blog post below!
Prerequisites to Downgrade from Android 14 to Android 13 on Google Pixel
Take Backup Of Your Data
Downgrading the Android version will delete all your previous data from the Google Pixel. Hence, you need to take a backup of your entire data by transferring it to your PC or cloud solutions like Google Drive, Dropbox, etc.
Download and Install the Android SDK Platform
You will need to download and install an Android SDK platform to establish Android Debug Bridge between your PC and the phone. ADB helps in downgrading the Android version on your Google Pixel phone. Read: How to Install ADB and Fastboot? That’s Okay! But I am new to the Android SDK Platform and don’t know how to install it. Well, don’t worry! Follow the process below to download and install the Android SDK platform on your system:
Firstly, you need to download the Android SDK platform-tools on your system. Depending on the OS of your system, you can click on the download link below and wait for the download to complete. Download Link for Windows Platform Download Link for Mac Platform Download Link for Linux Platform Once you download the files from the above section, you need to unzip the file now. Irrespective of the folder in which you unzip the files, you will see platform-tools at the end of the location name. Ex: C:\YourUsername\platform-tools
To execute the ADB commands, you need to enable USB debugging on your Google Pixel. Check out the next step for that.
Enable USB Debugging
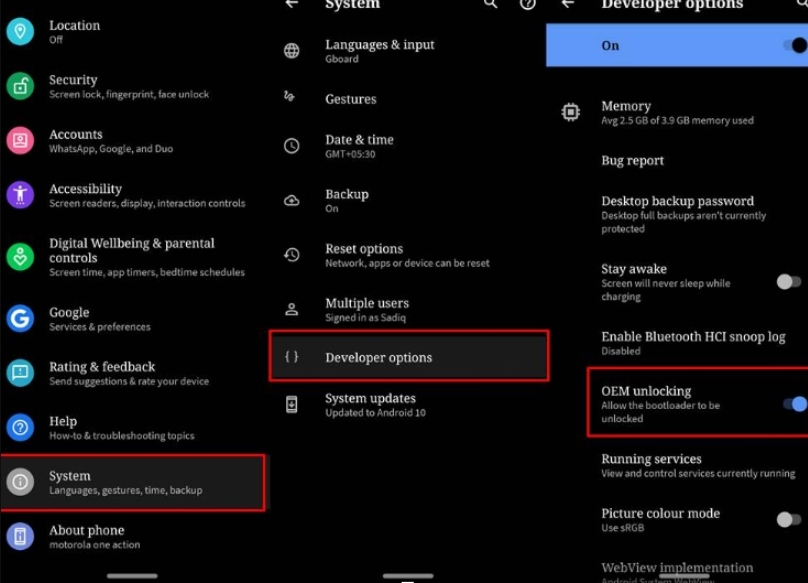
Once you have installed the Android SDK platform, enabling USB debugging and enabling OEM unlocking on your Pixel phone is time. You can find the USB debugging option under the Developer options. Here is how you can enable the USB debugging option:
Firstly, open Settings on your Google Pixel. Now, click on About phone. Tap seven times on the Build Number to unlock the Developer options. Now, navigate back to the Settings page. Tap on the System option and select Developer options.
Unlock the Bootloader
You need an unlocked bootloader on Google Pixel to downgrade the Android version from 14 to 13. Bootloader is software that runs in the background every time when your phone boots. Once you have installed the SDK and enabled the debugging mode on your phone, you need to unlock the bootloader to go ahead with downgrading the Android version on your Pixel phone. To unlock the bootloader, you also need to enable the OEM unlocking option. Here is how you can do that:
Go to Settings on your Google Pixel. Now, tap on Developer Options. Scroll down till you see the OEM Unlocking option and enable it.
Now, here is how you can unlock the bootloader
Connect the Google Pixel to PC via USB Now, open the folder where the Android SDK has been installed. Now, in an empty location, press the shift key and right-click. Select the option ‘Open PowerShell Window here.’
Now, start typing the following commands:
Type the following command in the PowerShell/CommandPrompt to boot the Pixel to fastboot/bootloader mode.
Now, to wipe off the data and unlock the bootloader of Google Pixel, type the command:
If you want to flash a custom ROM, type the command:
If you get a confirmation message on the screen, reply Yes, or I agree. Then type the following command to reboot the Pixel device.
Once you are done with the above prerequisites, here is how you can downgrade to the Android version:
Method 1: Downgrade the Android Version with Android Flash Tool
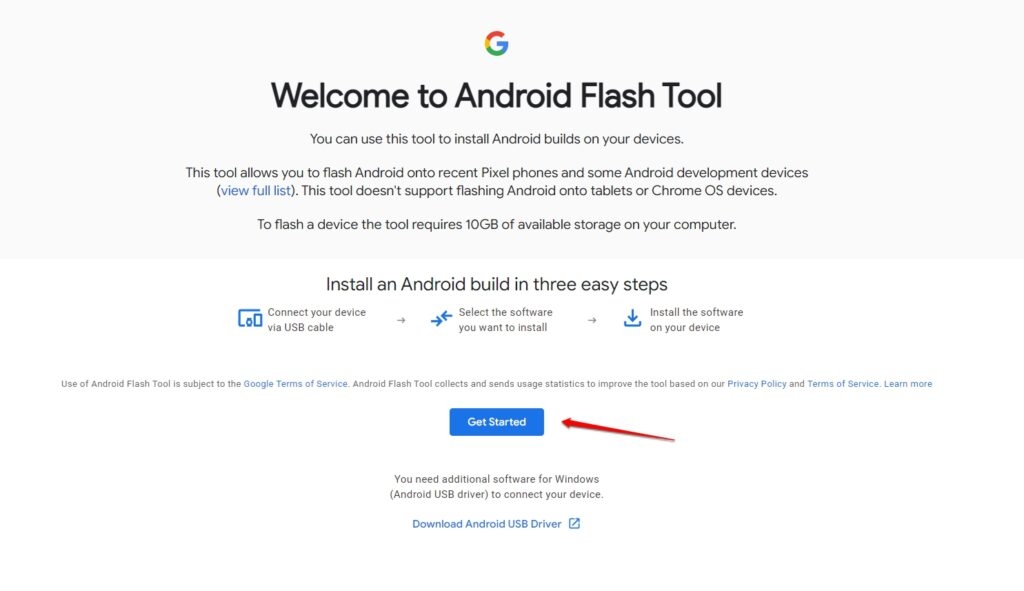
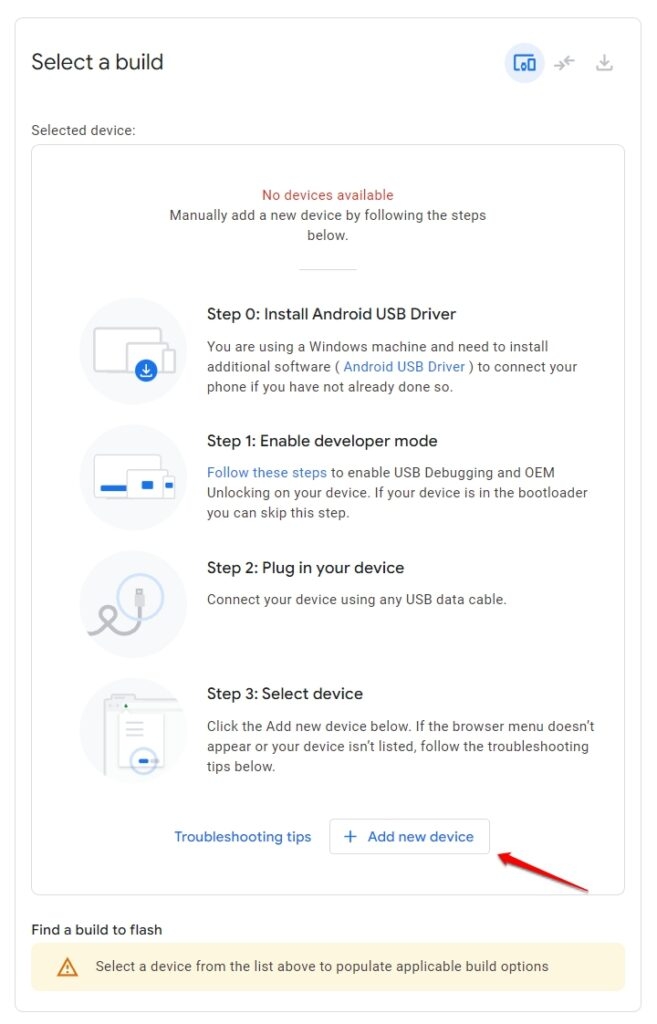
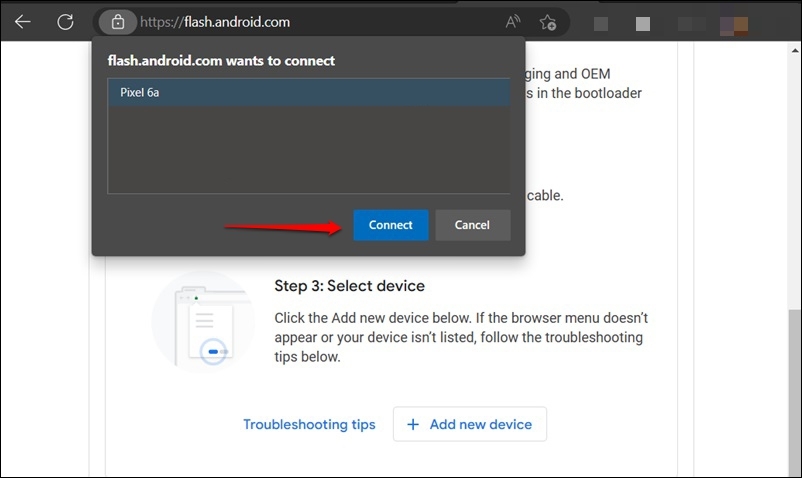
Firstly, connect the Google Pixel to PC with the help of a USB cable. Now, open the Android Flash Tool website on your PC and click Get Started.
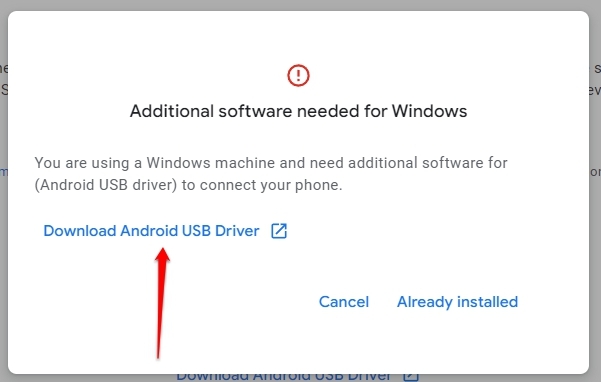
If your PC prompts “Additional Software needed for Windows,” you need to download the USB driver for the PC. If the message appears even after installing the driver, click Already installed to ignore the warning.
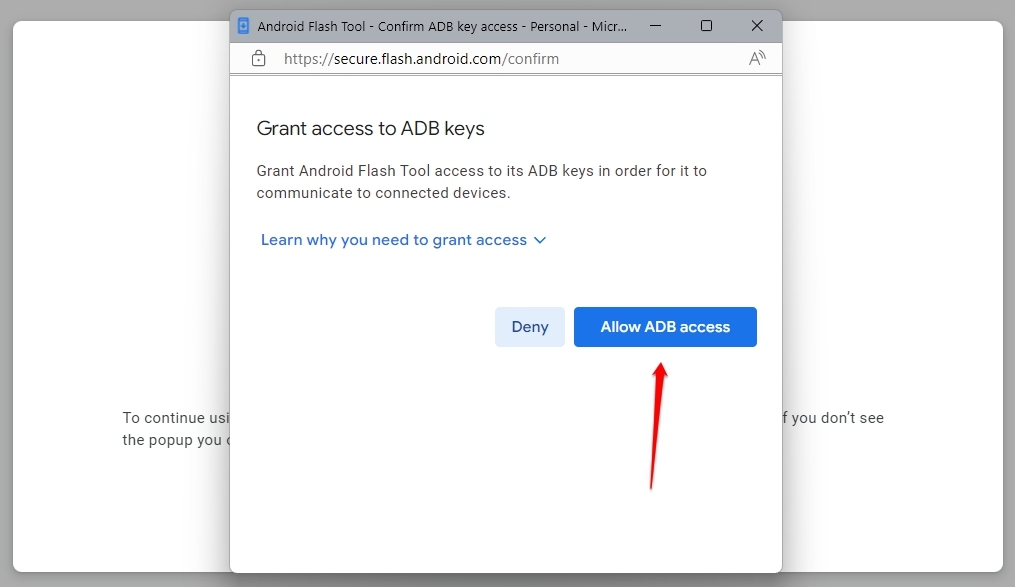
Now, allow ADB access on your PC.
Now, tap on Add New Device.
Select your Google Pixel phone and click Connect.
You will see the USB Debugging Prompt on your Pixel device. Select Allow option. Select the Android 13 build version you want to install on the Google Pixel phone. Click the selected Android build version’s pencil icon to see the options available. If you want to lock the bootloader, keep it checked. If not, uncheck the option. Click on the Install Build option and select Confirm on the next screen. Now, the Android Flash Tool will install the selected Android 13 version. Wait till the process is completed.
Method 2: Downgrade the Android Version via Fastboot
If the above process does not work, use the fastboot and downgrade the Android version on Google Pixel.
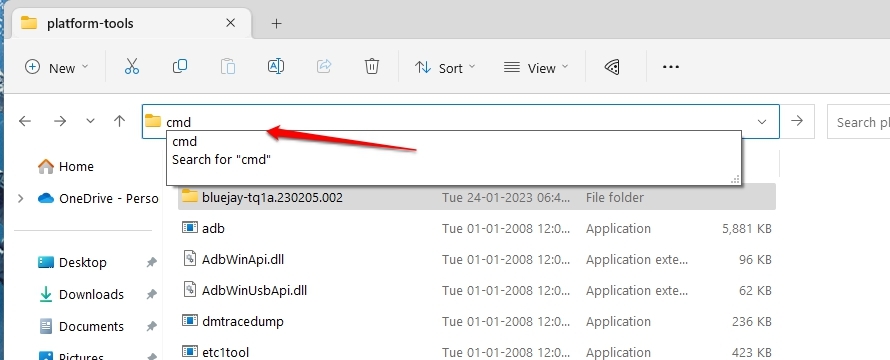
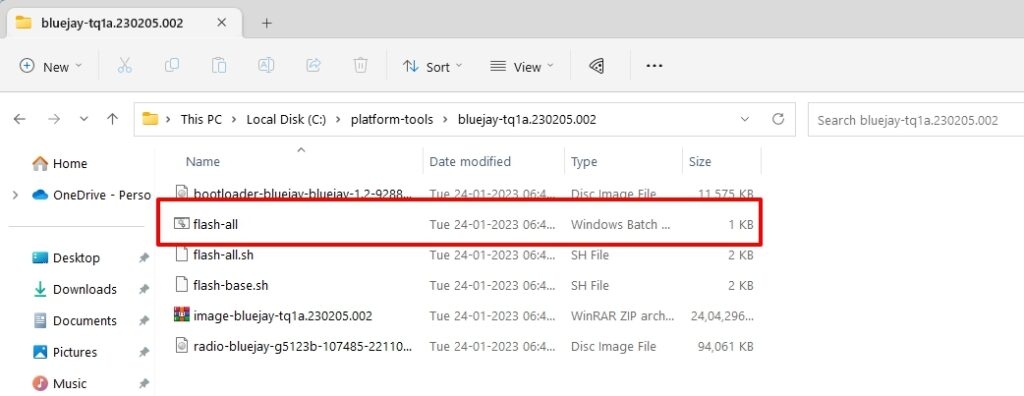
Firstly, download the Android Factory Image for Google Pixel. Now, extract these files on your PC in the Platform-Tools folder. (the one we got via the Android SDK Platform) Navigate to the Platform-Tools folder and launch the command prompt by typing “CMD” in the address bar. Now, type this command in the CMD:
Open the flash-all batch file by double or single-clicking and wait for the process to begin.
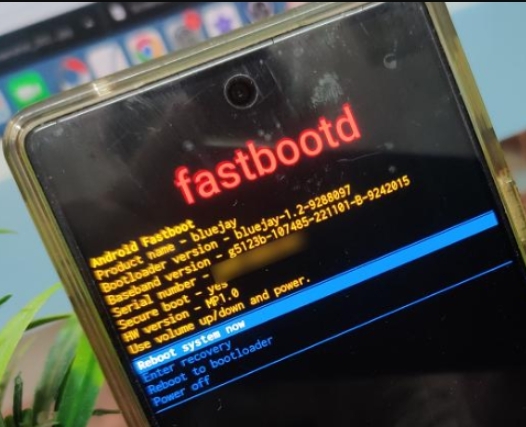
Google Pixel will now automatically boot to Fastboot as well as FastbootD modes.
Once the flashing is completed, you will be notified that the Android 13 version is installed.
Conclusion
Rolling back to the older build versions of Android is usually not recommended. However, if you want to downgrade to the Android version because you are having issues in the current version, you can follow the above process and downgrade from Android 14 to 13. Related Resources:
How to Boot into Fastboot Mode and Recovery Mode? How to Flash Custom ROM on Android Device What is Magisk | Root Android Device using Magisk