How to Repair Pen Drive Not Detected?
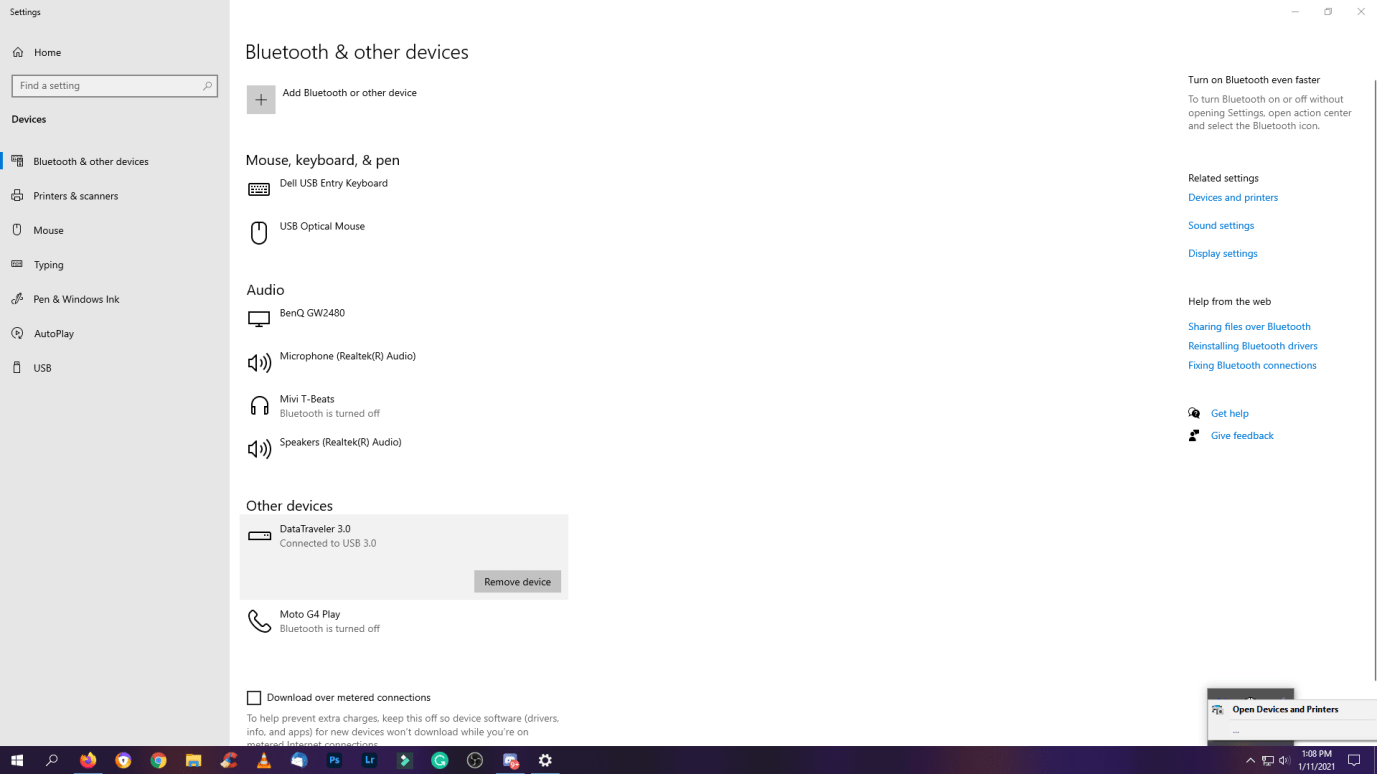
We created a bootable Ubuntu 18.0 pen drive, and it is no longer appearing in the list. Windows 10 detected, but its functions are not available at the moment. Of course, we want the USB drive to come back to life so we can put it to regular use. Allow us to guide you on how you can format it and make it usable again. Step 1: Press Windows Key + I simultaneously to open the “Settings” page. Step 2: Click on “Devices” to continue. Step 3: Now, find the USB drive name on the “Bluetooth & other devices” page. We found DataTraveler 3.0 under the “Other Devices” section located at the bottom. Your device should be on the list, or else you can move on to the next method to find an advanced solution.
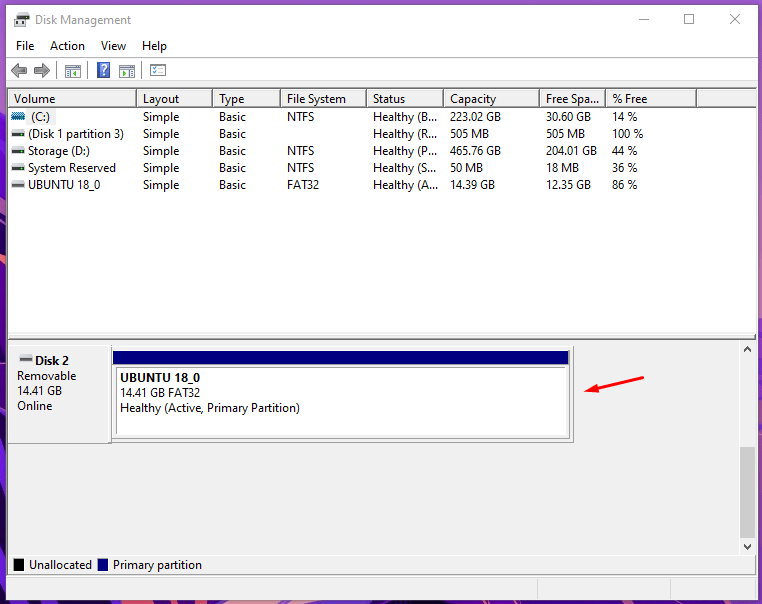
Step 4: Press the Windows Key button and then type “Disk Management” to start the process and click to open it. Step 5: A window will pop-up on the screen and then scroll down to the USB Drive to reveal the storage separately.
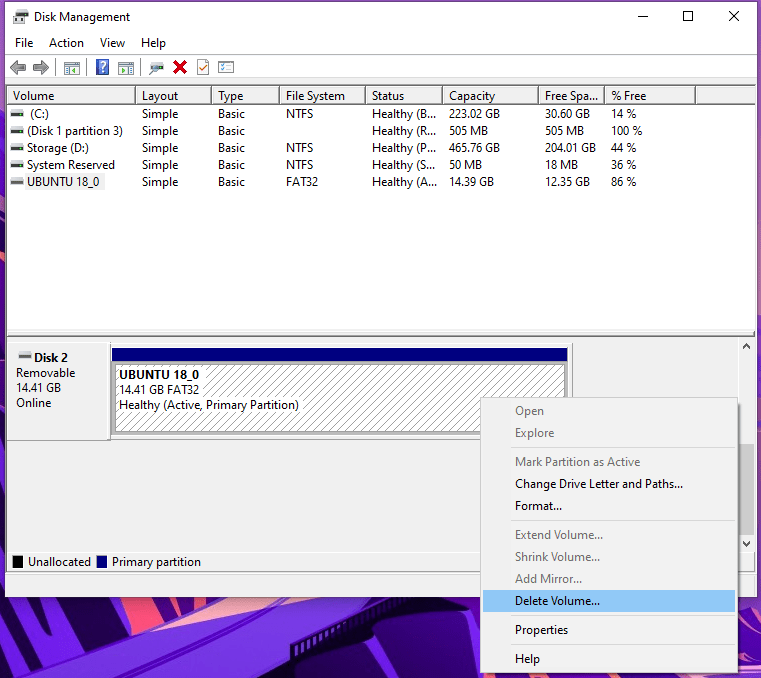
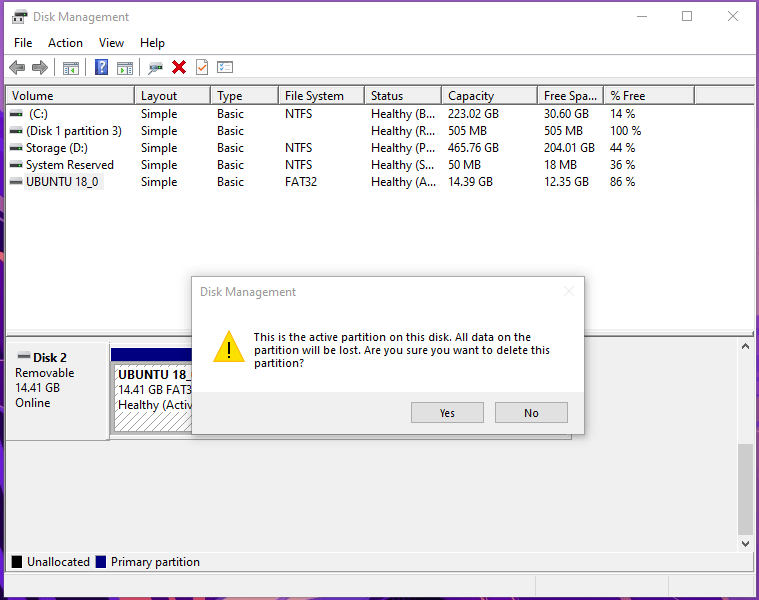
Step 6: Now, hover the mouse over the USB drive and then right-mouse click to view more options to choose “Delete Volume” to start the process.
Step 7: A warning notification will show up on the screen, and then click on “OK” to continue.
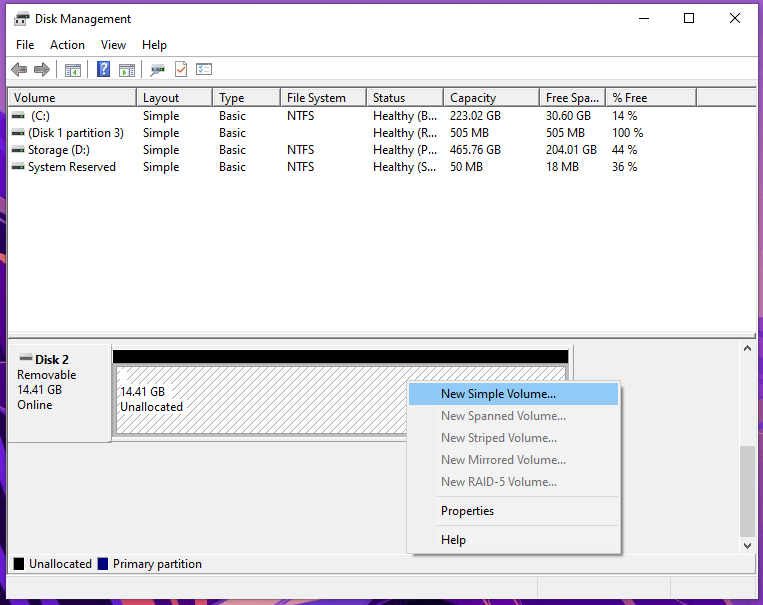
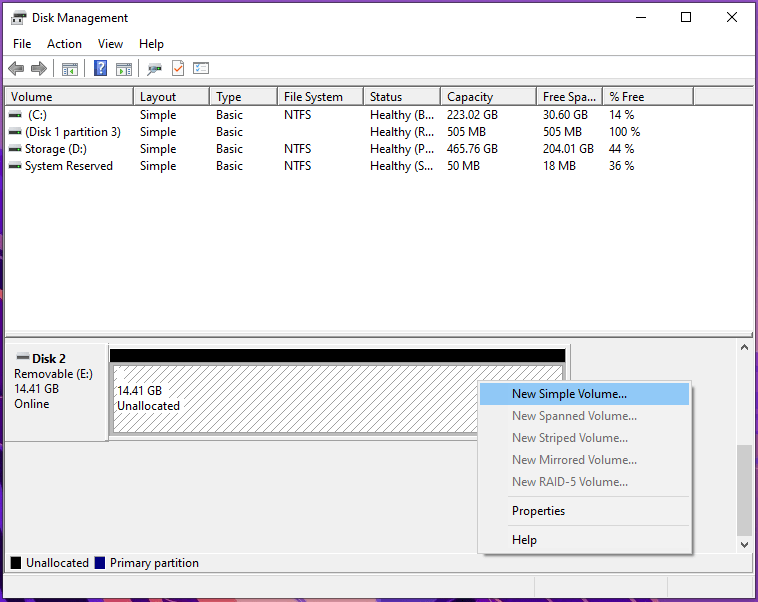
Step 8: Hover the mouse on the unallocated USB drive and then right-mouse click to view more options to choose “New Simple Volume” to create a new partition.
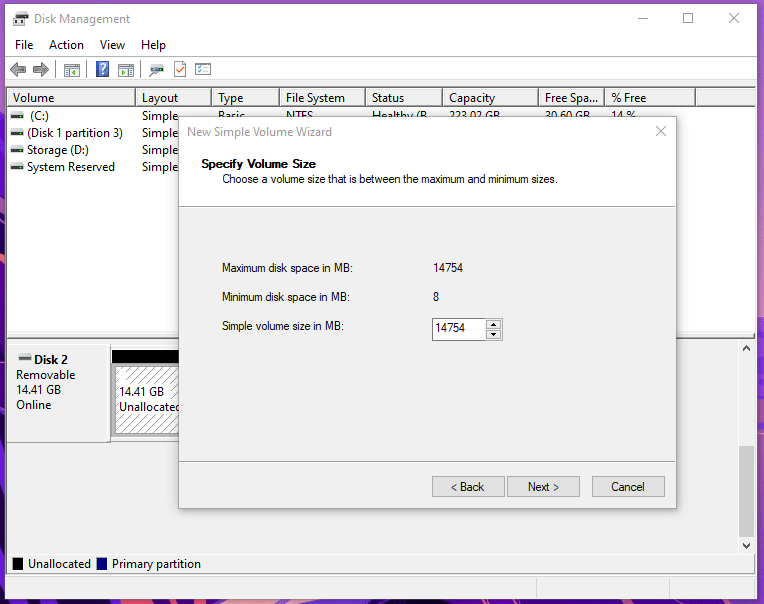
Step 9: Click on “NEXT” till the process is finished.
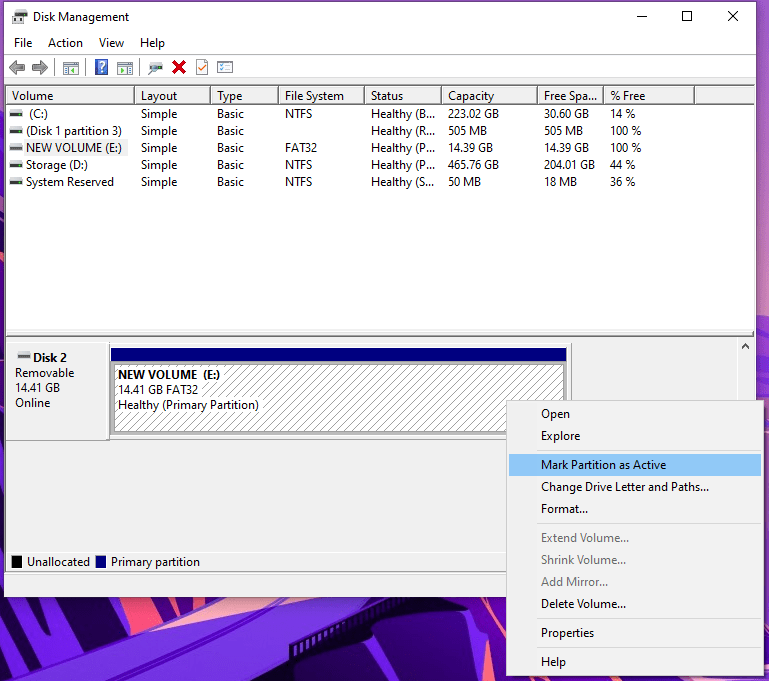
Step 10: Hover the mouse on the USB drive and then right-mouse click to view more options and then click on “Mark Partition as Active” to finish the process.
You can check the USB drive in File Explorer, and you should be able to find it & access it.
We created bootable drives multiple times on the same drive and suffered major damages due to the shortcomings of the Rufus and Balena Etcher program. In case, if this solution did not put life in the removable drive then you can try the next solution as it will work in complicated cases.
How to Fix Corrupted Flash Drive using CMD?
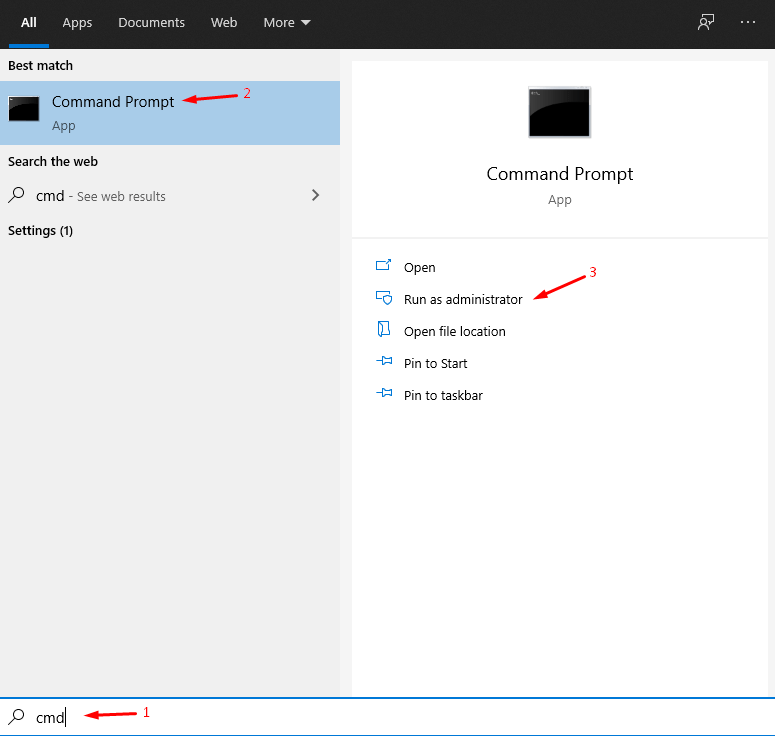
CMD stands for Command Prompt, and you can delete volume & create a fresh one from scratch. We have put the solution in practice multiple times over the years, and it doesn’t have a negative impact on the drive at all. Step 1: Press the Start button and then type “CMD” and run as administrator.
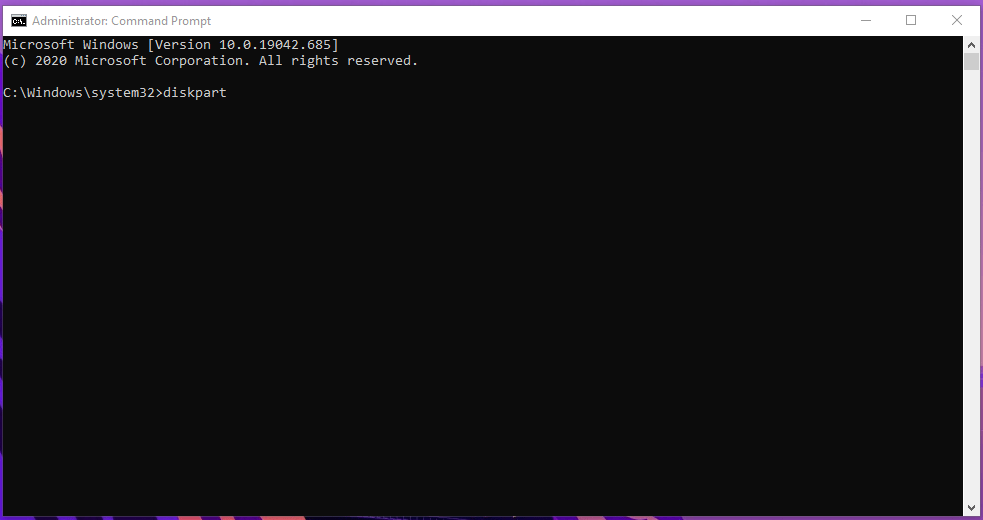
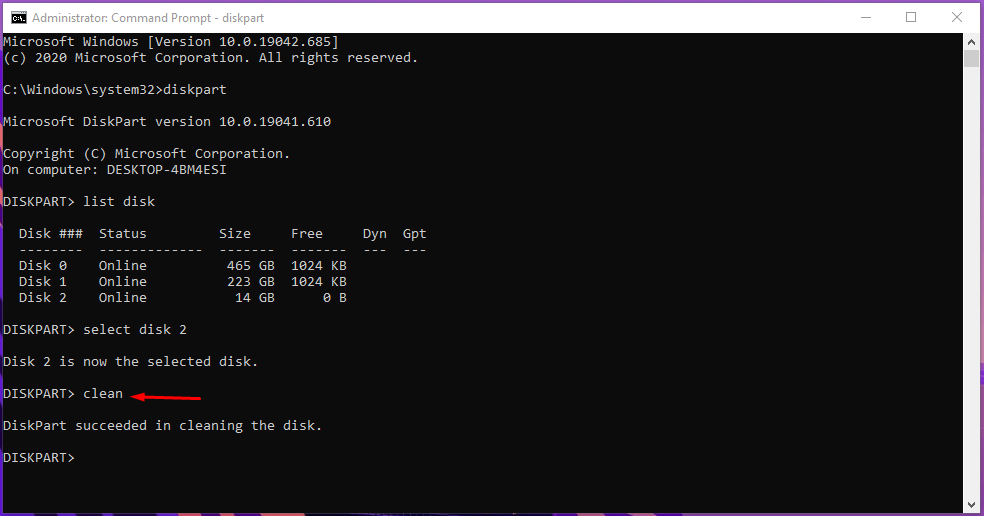
Step 2: Type “Diskpart” in the CMD and then hit enter to continue.
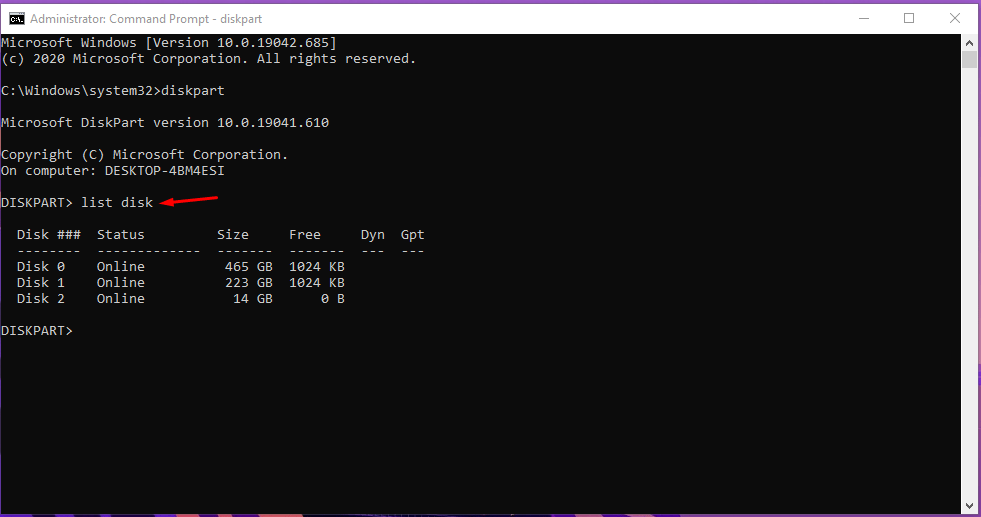
Step 3: Type “List Disk” and then hit enter to continue.
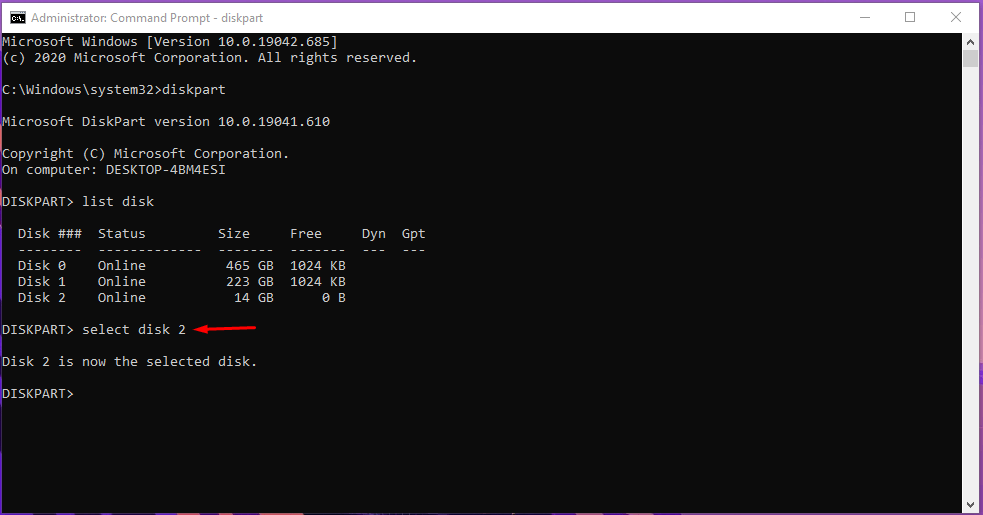
Step 4: Now, we have three disks on the list. Disk 0 – 465 GB (Mechanical Hard Disk) Disk 1 – 223 GB (Solid-State-Drive) Disk 2 – 14 GB (USB Drive) In our case, disk two is a USB drive, so we have typed “select disk 2” and then hit enter to register it.
Remember, you have to identify the drive from the list and it is not the same for everyone, so take your time to identify the drive via storage capacity. Step 5: Type “clean” and then hit enter.
The Diskpart command will clean the drive removing the partitions from the disk, which will remove all partitions created by Rufus or other programs. Step 6: Now, follow the first solution from Step #1 that we have mentioned above in the tutorial.
We are not going to use CMD to create partitions because you can use Disk Management to create new partitions In order to minimize the complications. You are saving time and effort in remembering the CMD commands and using the existing tools to finish the process at a faster pace.
How to Fix Corrupted Flash Drive using the third-party program?
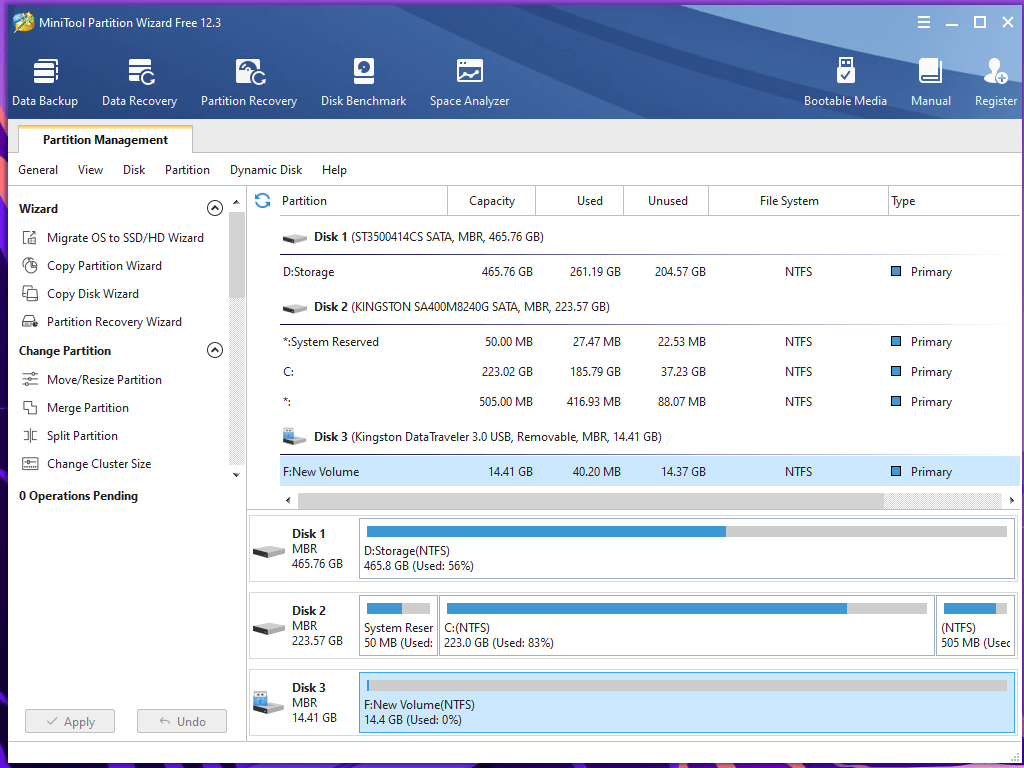
We created a bootable WayneOS drive a few weeks back, and the flash drive went into a deep state of coma. None of the traditional solutions fixed the problem, which forced us to seek assistance from third-party solutions available in the web market. Of course, we don’t want to spend a single penny on solving the problem of one flash drive because it’s not worth the money. Finally, we found one program that fixed corrupted flash drive within ten minutes. Step 1: Download, install, and launch MiniTool Partition Wizard Free. Step 2: The program will detect the hidden drive and click to select the flash drive.
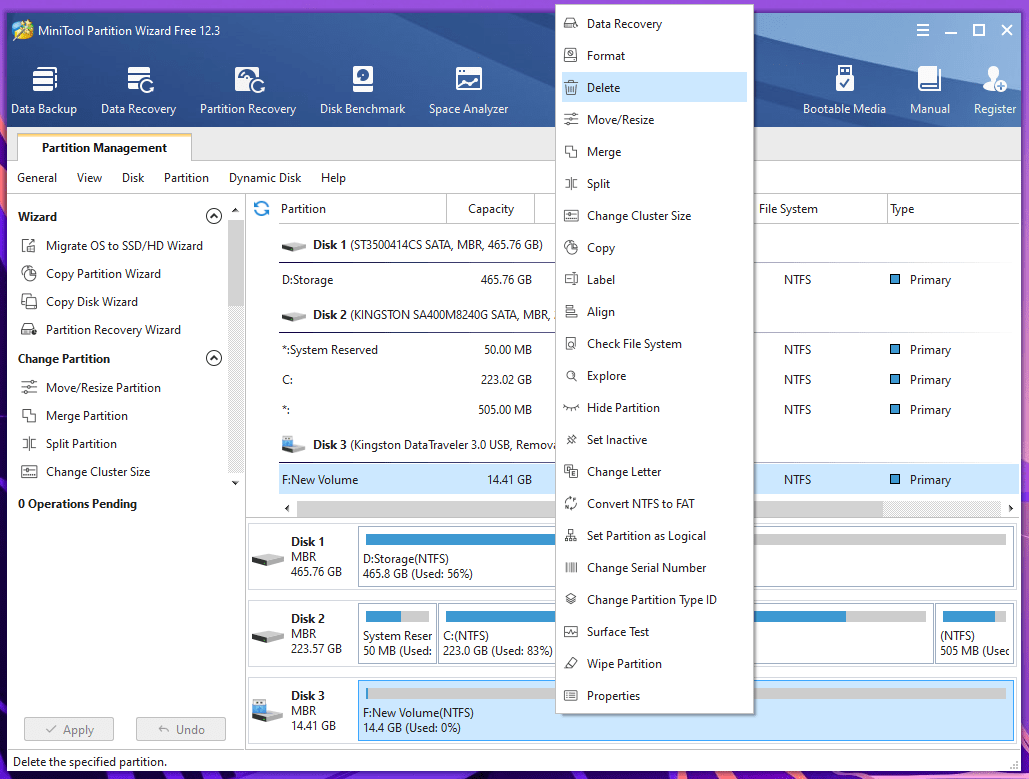
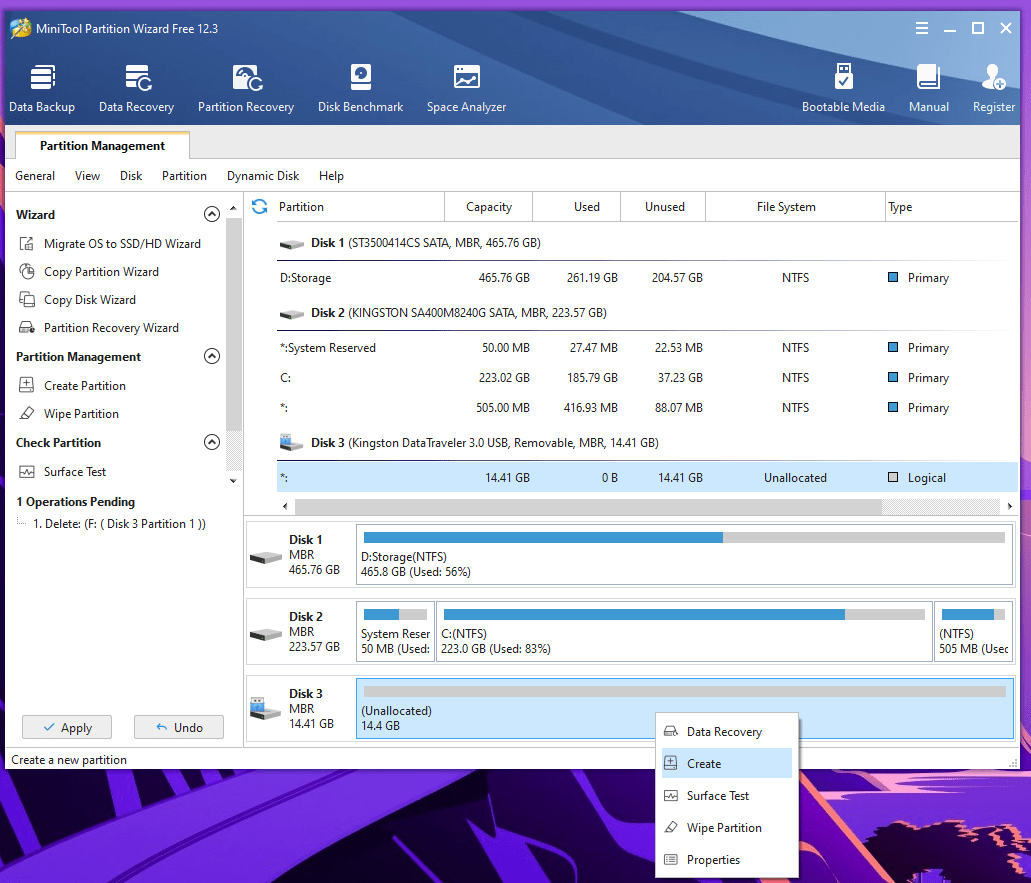
The user-interface looks intimidating, but follow our guide to delete the volume and create a new partition. Step 3: Select the flash drive and then right-mouse click to view more options and then choose “Delete” to remove all partitions.
Step 4: Right-mouse click to view options and then click on “Create” to create a new partition.
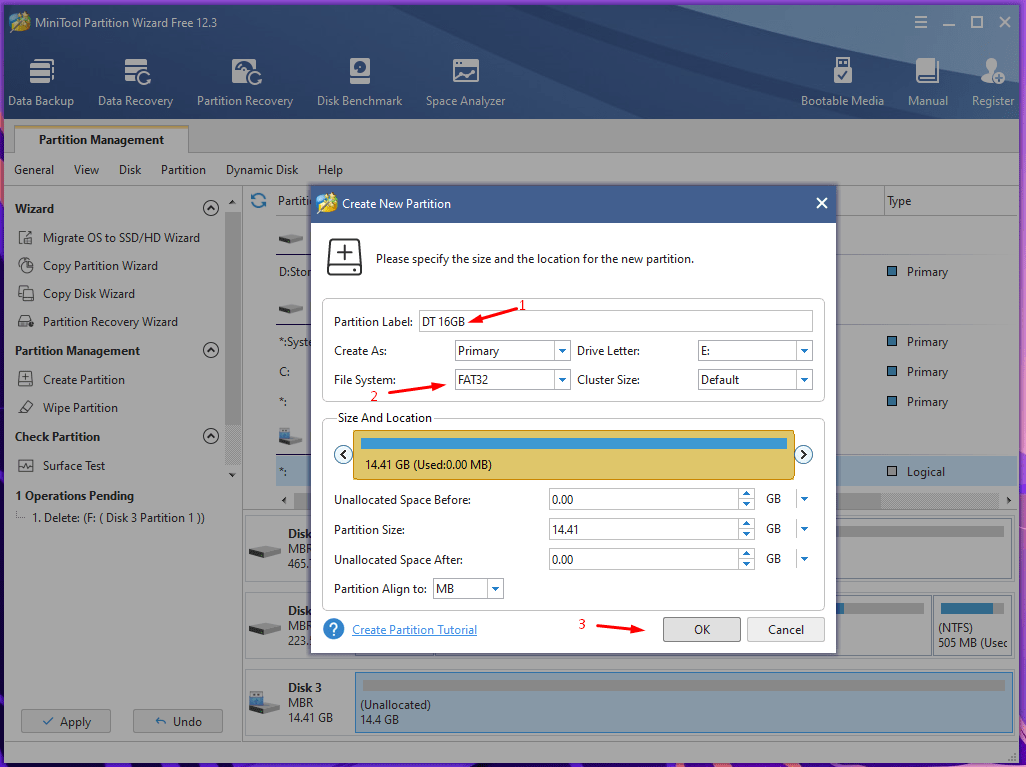
Step 5: Now, give the new partition a name, select the file system, and then click on “OK” to finalize the changes.
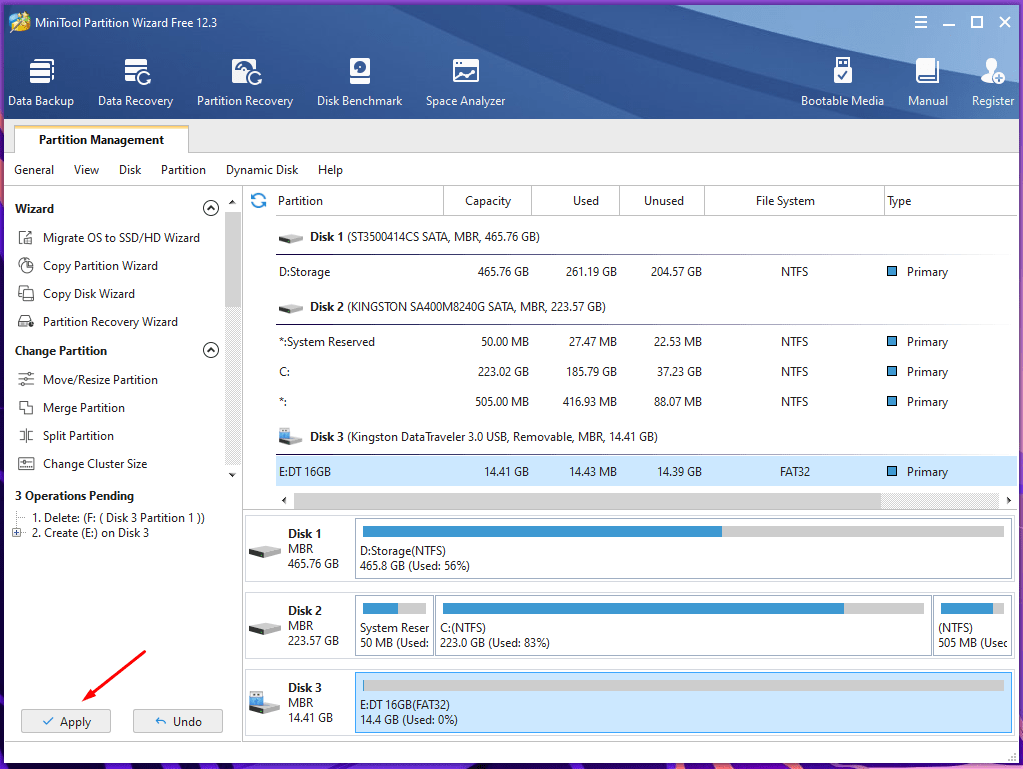
Step 6: Click on “Apply” to make the changes.
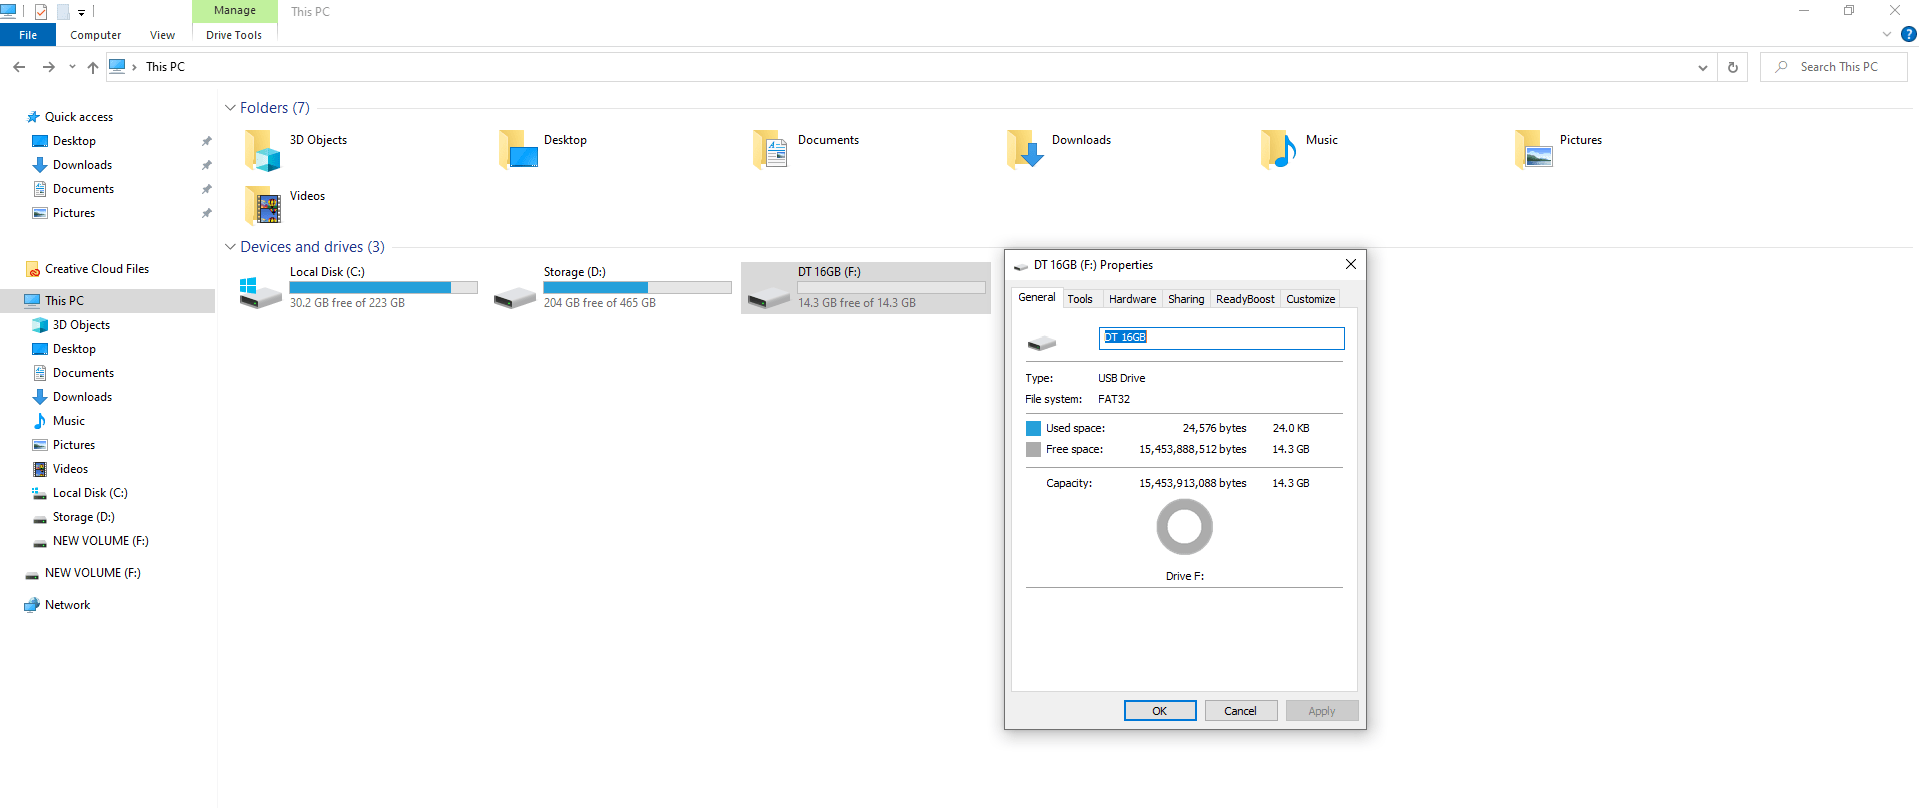
A new window will pop-up on the screen and let it delete the volume and create a new partition from scratch. Close the MiniTool Partition Wizard Free and then check the flash drive in File Explorer.
The biggest drawback of the program is that we lost 100MB storage from the flash drive but it was worth it as it revived the flash drive.
Bottom Line
Readers can revive the flash drive back to its original state without spending a single penny on third-party solutions. None of the bootable drive creator programs take responsibility for the damages, so you have to take necessary precautions to avoid damaging the flash drive. You can use the three methods that we have suggested to fix the corrupted bootable USB drive in Windows 10 PC. If you’ve any thoughts on How to Repair Corrupted Bootable USB Drive in Windows 10?, then feel free to drop in below comment box. Also, please subscribe to our DigitBin YouTube channel for videos tutorials. Cheers!
Fix – Easy Way to Stop Kodi from Slow Buffering Issues Display Resolution Not Changing in Windows 11: Fix it Now How to Fix VLC Player Codec Error in Windows PC?
Comment * Name * Email *
