Imagine you update the blog post title, description, or featured image, then what Facebook will show when you’ll share it again. It will not show your updates. Here the importance of the Facebook Debugger tool comes. It is also known as FB debugger, Facebook sharing Debugger, Facebook URL debugger, or Facebook link debugger. Let’s check out how to use the Facebook debug tool to scrape the URL and update the Facebook link preview.
What Does the Facebook Debugger Tool Do?
If you wish to create a fantastic and catchy post on Facebook, then you must know the use of Facebook Debugger. It helps to check what meta information (like post title, post description, and featured image, etc.) will be taken from your blog post when you share it on Facebook. You need to copy-paste the link in the FB debugger, click the Debug button, check the information, and change it accordingly. It is required to check with the FB debugger if everything is right before sharing your blog post on the Facebook Wall, Facebook Page, or Facebook Groups. Just take a look and try to make it more awesome to get more likes and share. It is one of the best Facebook marketing tools.
How Facebook Debug Tool Scrape Data?
Facebook link debugger is a handy tool; it does not matter which blogging platform you are using. It is different from Facebook Object Debugger. It is useful for WordPress, Blogger, Ghost, and all. Earlier I told you Facebook URL debugger scrapes information using meta tags. If meta tags are absent, it will work like Google and identify the H1 or H2 tag to show the title, first paragraph as a description, and first image as a featured image. After sharing a post, Facebook will make a cache and won’t delete it automatically. You need to do it manually using Facebook Sharing Debugger. This information about FB debugger is beneficial for a tech geek or social media people like you.
Why Facebook Not Scraping OG Information Correctly?
How to Use Open Graph for a Blog?
Facebook Sharing Debugger helps developers troubleshoot issues, but it is now more prevalent among social media managers. It scrapes the URL and fetches the meta information, or flushes the existing cache. Don’t expect too much. First, you use Open Graph or Schema to set up everything correctly. For WordPress users, the Yoast SEO plugin will be a great choice, and Blogger/Blogspot users should implement it manually. Learn how to use Open Graph for Blogger or Blogspot. If you want to shine on social media, then you must use Facebook share debugger. Your post should look as you wish to. It will help to engage a more and more targeted audience. Don’t waste your hard work due to the wrong image or no image on the social media post. The image does a lot to attract and engage users to grow likes and share.
How to Use Open Graph with Yoast SEO?
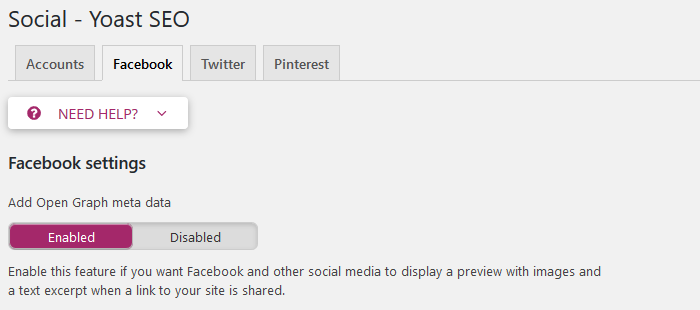
You need to enable the Open Graph for your blog.
Go to Yoast SEO > Social > Facebook (Tab) > Facebook settings > Enable > Save changes After completing the above steps, Open Graph metadata will be enabled for your blog. It will automatically detect and show all information post title, description, featured image, etc. Find complete information on Yoast Knowledgebase here.
How to Use Custom Facebook Open Graph Tags?
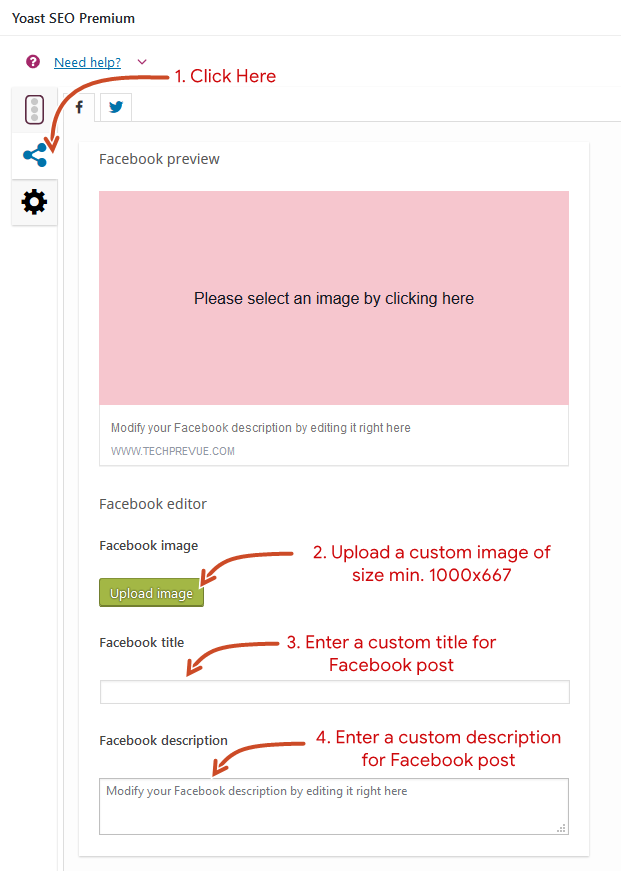
If you need custom Open Graph tags for every page, then you need to set them.
Find complete information on Yoast Knowledgebase here.
How to Use Facebook Debugger?
I have already mentioned, the Facebook Sharing Debugger is simple to use. I am sharing a how-to guide. It is a step-by-step guide for you.
Step 1. Run the Facebook Debugger
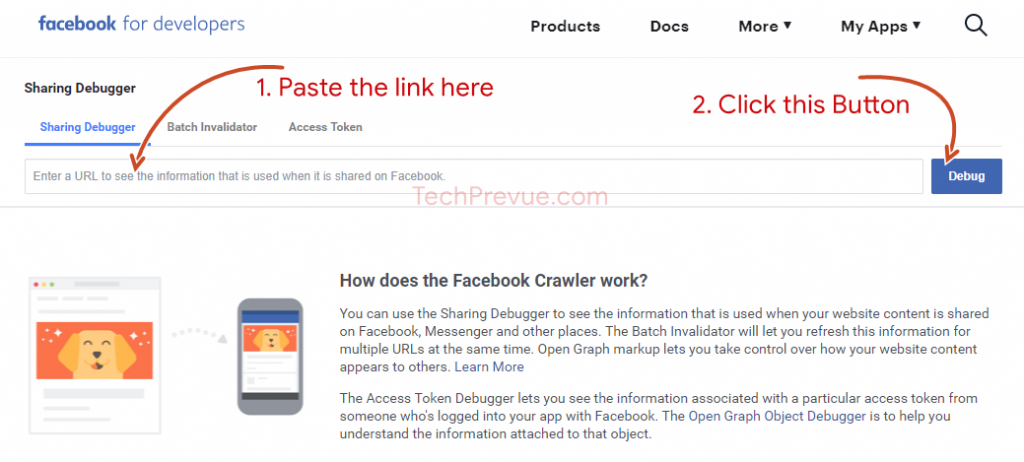
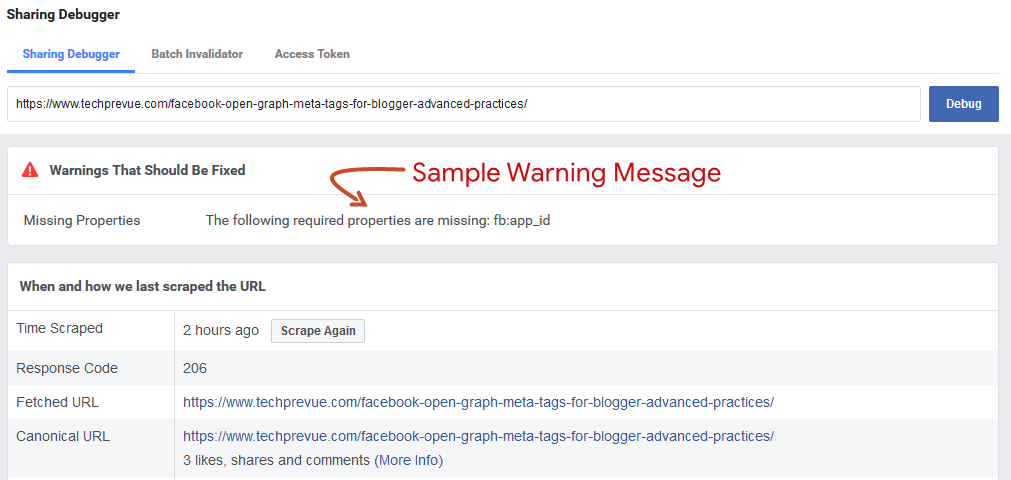
Access the Facebook debugger here. Copy and paste the link which is showing incorrect information on your Facebook post. Click the blue Debug button.
Step 2: Review the Open Graph Markup
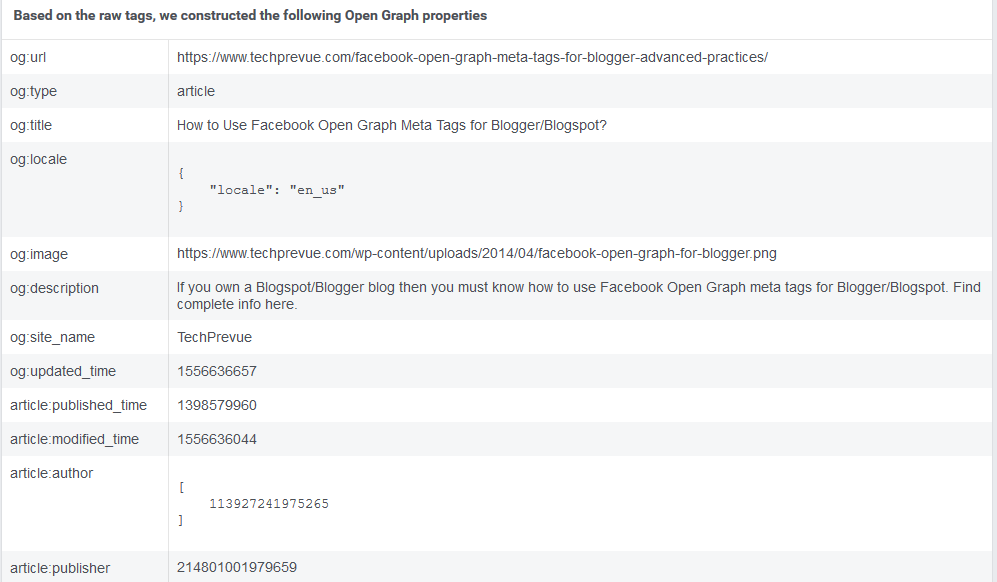
Now Facebook Share Debugger shows where a glitch is and what to fix. Warnings help you to analyze what exactly you need to do to correct the problem. Facebook Debugger can show these frequent warnings: Inferred Property: It means no image is available to use as a thumbnail or multiple image properties are set. In the second case, Facebook chooses one among the available options. Extraneous Property: It is about “og” properties. When one of the “og” properties is unrecognized or depreciated, this warning will be shown. You can identify that particular og property and fix it quickly. Missing App ID: This warning is related to the “fb:app_id” property that is unspecified in your blog or website. If you have a separate app, then this warning may be shown. Parser mismatched metadata: It means scraped data does not match with the original one. It is owing to the wrong date format or extra spaces in the title. The warning shows which property should be fixed. Following are the most used “og” properties: Just fix the issues causing trouble to your blog post, and after that, again scrape the link and check if everything is as expected.
Step 3. Flush the WordPress Cache
If you have trouble scraping Open Graph metadata correctly, do not forget to clear the WordPress cache or Cloudflare cache and try again, i.e., scrap the link. It may or may not help you to fetch the correct Open Graph tags correctly. If not able to get the result, try Open Graph Object Debugger.
How to Use Open Graph Object Debugger?
After flushing the cache and scraping again, if correct information is not showing up, you need to use the Facebook Open Graph debugger tool. It is also known as the Facebook object debugger. Access to open graph object debugger here.
This Open Graph Debugger tool works similarly. Enter a link to see existing scrape information and fetch new scrape information. Now Facebook link preview has been updated, and you can share your website or post on Facebook to reach millions of users. Now, you know the Facebook Debugger tool, what debugging is, and how to do Facebook debugging. If still something missing about Facebook share debugger. Let us know. We will work upon and extend the article for you.
